Arrows is a logic puzzle in which you must place arrows outside the grid according to certain rules.
In a hurry? Jump to: Rules / Tips / Worked Example / Download Puzzles / Books
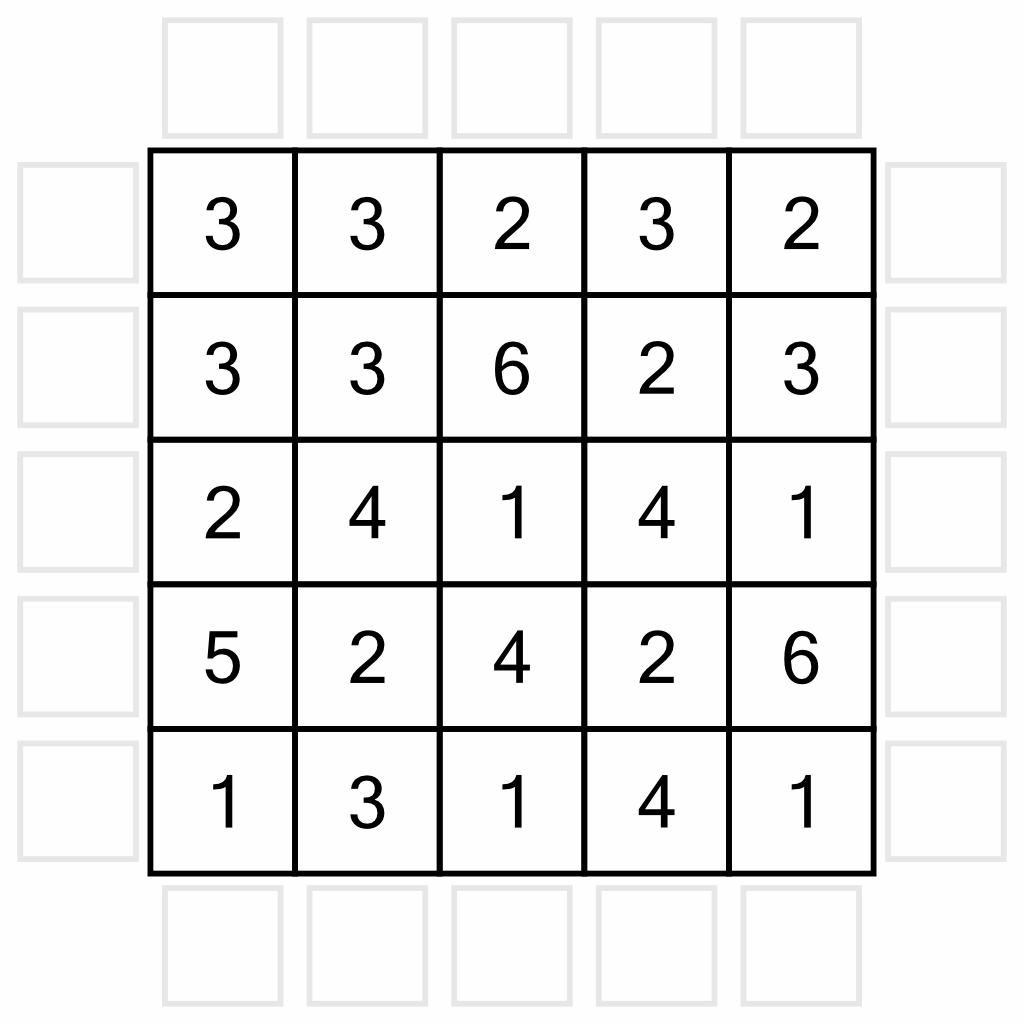
Here’s what a small Arrows puzzle looks like:
Your task is to place arrows in the empty boxes around the grid in such a way that each box contains a single arrow that points to at least one number in the grid. The numbers tell you how many arrows point to that cell.
Here’s what the earlier example looks like once solved:
Solving these puzzles is all about elimination. They can seem daunting at first (especially larger ones), but by taking a methodical approach and applying logic, we can always reach the correct solution.
Before we get into specific tips, here are some useful things to bear in mind about Arrows puzzles.
We can attack a puzzle on two fronts: by looking at the numbers and trying to work out from which directions the arrows must point at them, or by looking at the arrow cells and working out where they must point. Considering that most numbers have eight potential arrows pointing at them, but any given arrow cell only has three possible directions in which it can point, we’re better off working from the arrows inwards. If we can eliminate two out of three directions that an arrow could point, we can complete the arrow cell.
Here are some tips to help you get started with solving Arrows puzzles. In a moment, we’ll work through a puzzle from start to finish and put these into practice.
Let’s put some of the tips above into practice and work through a puzzle from start to finish.

This is the puzzle we are going to work through. We’re using a very simple puzzle here as anything larger would make this walk-through way too long. Being an easy puzzle, we are provided with clue numbers in all the cells. Harder levels have fewer clues.

Before we get started, a quick word on notation. As we’ll be eliminating possible arrow directions, we need a consistent way of doing so. Any given cell has three possible arrow directions: up / down / horizontal for the sides, and left / right / vertical for the top and bottom. Here we have the three possible side arrows shown. As we eliminate possible placements, we can place an X in the relevant position to rule it out.

The very first thing we can do on any puzzle is eliminate ‘illegal’ arrow positions in the corners. The rules state that arrows must point towards at least one number. That means that the arrows shown here are not acceptable as they don’t point at any numbers….

…so we can put Xs in all those positions to rule them out. It’s not strictly necessary, but it makes things easier later on.

Now let’s look at the 0. No arrow can point to it, so we can add in more Xs as we eliminate all the positions that could point to it. That means no vertical arrows in the column the 0 is in. I’ve eliminated those with the purple Xs.

It also means no horizontal arrows for the row the 0 is in, so we eliminate those with Xs too.

And of course we mustn’t forget the diagonals. That gives us four more arrow positions to eliminate.

With all those eliminations, we’ve got some places to put some arrows on the board. We’ll start at the top. With the vertical arrow and diagonal right arrows not an option, we know we must place an arrow going diagonal left, pointing at the cells highlighted here.
At this point we are going to add another kind of note to the board. Each of the three highlighted cells now has an arrow pointing at them, so we’ll mark each one with a dot. This will help us keep track of which cells are ‘complete’, which will be essential later on.

Working around clockwise, we can place a horizontal arrow pointing to this row. Again, we add a dot to each of the cells it’s pointing to.

Still going clockwise, we have another placement here. And again, we add dots to all the numbers the arrow is pointing to.

And lastly for now, we can put in this vertical arrow.
So where next? We’ve used up all of the known placements, so how can we eliminate any more? We’re going to have to find some constrained numbers – those with limited placement opportunities that can help us out.

We know that numbers on the main diagonals are already more constrained than the other numbers on the board, as they can only have a maximum of six arrows pointing at them, not eight. The largest number on a main diagonal is this 5. It’s already got two arrows pointing to it, so it needs three more. There are four more potentials, but we don’t know which three are the ones we need to use.
Note: Although we don’t know which of those four arrows will be used, we do know that at least one of the ones on the diagonal will have to be used. Had this 5 been deeper in the board and not in a corner, that information could have allowed us to add a dot to all the other numbers on the same diagonal, which may have helped us move forward. In this puzzle, with the 5 being in the corner, it’s no help, but this is an essential technique when working on harder level puzzles.

The next largest number on a main diagonal is this 4. It’s already got one arrow pointing to it. Out of the remaining five possibles, two have been eliminated (highlighted here in yellow). We need three arrows, and lo and behold there are only three places to put them!

We’ll draw them in one at a time, taking care to add dots to our number tallies as we go. First the top one…

…then this bottom one. That’s ‘completed’ two of the numbers in this column. The dot tallies let us see at a glance that the 2 and the 3 both have the requisite number of arrows pointing at them. We’ll draw circles around those numbers to remind us we can’t point any more arrows at them. That will allow us to eliminate more potential arrow positions in a moment, but first…

…we’ll just draw in that last arrow for the 4. Adding the dots confirms the 4 is now complete, so we can circle it.

Now we can use these three newly circled cells to eliminate more arrow positions. The 2 gives us three new eliminations (purple Xs). I haven’t drawn in the one to the left of the row as that arrow is already placed, so we don’t need it.

The completed 3 also eliminates three arrow positions (purple Xs).
We know the 4 doesn’t eliminate anything because we already used up all the remaining positions.

We’re really motoring now. We’ve got lots more arrows we can place. Going around the board clockwise again, we’ll start with this diagonal. That completes the 1 in the corner, which in turn allows us to eliminate an arrow position on the diagonal (purple X).

This next new arrow puts three more dots on the board…

…and this one completes two numbers, which in turn give us two new eliminations.

We can place all three arrows up in this corner. They complete several new numbers, which in turn eliminate further positions (again, the purple Xs).

We know where to place the final three arrows. I’ve added the dot tallies to the numbers, but there’s no need to circle them, we’re all done!
Phew! How did you get on? Did you race ahead and finish before the end of the example? If you want to have a go and try some more, including some harder puzzles, there’s a taster pack to download below.
This was an easy puzzle, but it shows the basic techniques used in solving. Harder puzzles have fewer clue numbers, and require using more advanced logic like partial-elimination when you know the direction of an arrow (horizontal, vertical or diagonal), but not from which side it originates.
Ready to try some puzzles yourself? We’ve put together a sample pack of four grids for you – a couple of easy ones like this example, and a couple that are more challenging. Download the PDF below. Solutions are included so you can check your results.
Click Here To Download The Taster PDF

Ready for even more Arrows? We’ve got you covered!
Puzzle Weekly Presents: Arrows is a collection of 120 puzzles set over seven levels of difficulty. Grab a copy here.
Got a Kobo? We’ve got Arrows puzzles for that too! Arrows for Stylus Devices presents 100 puzzles over five levels, and is designed especially for Kobos with stylus. Find out more here.